Posted on Leave a comment

Importance of wheel balancing in everyday life

Understanding Wheel Balancing

Wheel balancing plays a crucial role in maintaining both the performance and safety of your vehicle. When your wheels are properly balanced, it ensures a smooth and stable driving experience while minimizing potential safety hazards.

Importance of Wheel Balancing

Properly balanced wheels prevent vibrations that can affect the overall comfort of your ride and potentially lead to discomfort for passengers. Additionally, balanced wheels help to distribute the weight evenly across all tyres, reducing stress on individual components and promoting longer tyre life.

Effects of Unbalanced Wheels

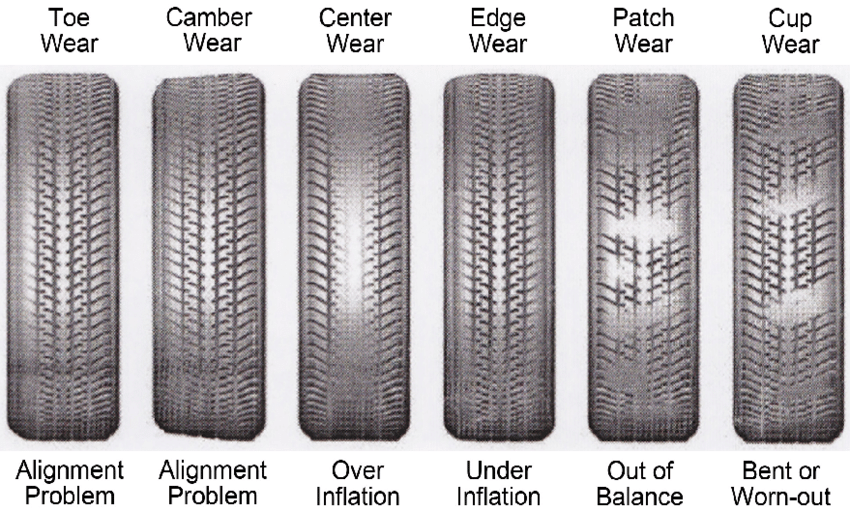
Unbalanced wheels can result in various issues such as vibrations felt through the steering wheel or vehicle chassis, especially at higher speeds. Moreover, unbalanced wheels can cause uneven tyre wear, leading to premature tyre replacement and additional expenses. In severe cases, unbalanced wheels may contribute to safety hazards, affecting vehicle stability and control.

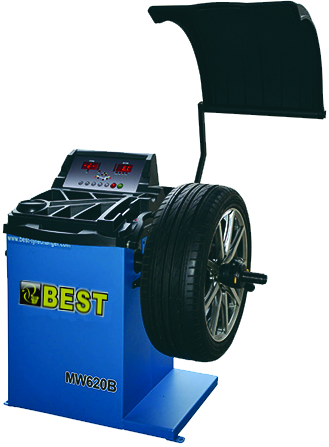
Role of Wheel Balancers

Wheel balancers are essential tools used by automotive technicians to identify and correct imbalances in wheels. By accurately measuring tyre and wheel weight distribution, wheel balancers can pinpoint areas of imbalance and recommend corrective measures such as adding or removing wheel weights. This process ensures that each wheel rotates smoothly and evenly, promoting optimal vehicle performance and safety on the road.

Frequency of Wheel Balancing

Recommendations Based on Driving Habits and Road Conditions

Determining how often to balance your wheels depends on various factors, including your driving habits and the conditions of the roads you frequent. Here are some recommendations to consider:

  • Kilometres: Aim to balance your wheels every 8,000 to 10,000 kilometers or during routine tyre rotations to maintain optimal balance.
  • Driving Speed: High-speed driving can accelerate tyre wear and imbalance issues. If you frequently drive at highway speeds, consider balancing your wheels more frequently to ensure smooth performance.
  • Road Quality: Rough or uneven road surfaces can exacerbate wheel imbalance problems. If you regularly encounter potholes, debris, or poorly maintained roads, you may need to balance your wheels more often to prevent premature wear.

Consult Manufacturer Recommendations

Always refer to your vehicle manufacturer’s recommendations for specific guidance on wheel balancing intervals. These guidelines take into account your vehicle’s make, model, and specifications, providing tailored advice for optimal maintenance. Additionally, consider scheduling regular maintenance appointments with a trusted auto service provider. Professional technicians can assess your vehicle’s condition and recommend appropriate maintenance schedules, including wheel balancing, to ensure safe and efficient operation on the road.

Benefits of Balanced Wheels

Improved Ride Comfort and Handling

Balanced wheels result in a smoother and more comfortable ride by minimizing vibrations and jolts transmitted from the road to the vehicle. This improved comfort enhances the overall driving experience, making long journeys more enjoyable.

Enhanced Tyre Longevity and Fuel Efficiency

Properly balanced wheels promote even tyre wear, extending the lifespan of your tyres and optimizing fuel efficiency. By reducing uneven tread wear, balanced wheels help you get the most out of your tyre investment while also improving fuel economy.

Increased Vehicle Stability and Steering Precision

Balanced wheels contribute to vehicle stability and steering precision by ensuring uniform weight distribution across all tyres. This balance enhances the vehicle’s handling characteristics, making it easier to maintain control and manoeuvre safely, especially at higher speeds or in challenging driving conditions.

Prevention of Premature Tyre Wear and Suspension Damage

Balanced wheels prevent premature tyre wear by eliminating excessive stress on specific areas of the tyre tread. This balanced distribution of weight reduces the risk of irregular tread wear patterns, which can lead to premature tyre replacement and potential suspension damage. By maintaining proper wheel balance, you can extend the life of your tyres and avoid costly repairs down the road.

Conclusion and Recommendations

Selling Wheel Balancing Services and Nitrogen Tire Inflation

Now that you understand the importance of wheel balancing and its significant benefits for vehicle performance and safety, let’s discuss how you can effectively sell wheel balancing services to your customers, along with the idea of nitrogen tire inflation.

Educate Your Customers

Start by educating your customers about the importance of wheel balancing and its impact on their driving experience. Explain how unbalanced wheels can lead to vibrations, uneven tire wear, and safety risks, and highlight the benefits of regular wheel balancing for smoother rides and longer tire life. Additionally, introduce the concept of nitrogen tire inflation and its advantages over traditional air filling methods, such as improved tire pressure retention and enhanced fuel efficiency.

Offer Value-Added Services

Consider offering value-added services along with wheel balancing, such as nitrogen tire inflation. By providing comprehensive maintenance solutions, including nitrogen tire inflation, you can address all aspects of your customers’ vehicle care needs and provide them with superior performance and safety benefits.

Showcase Professional Expertise

Emphasize your professional expertise and experience in using high-quality wheel balancing equipment and nitrogen generating machines. Highlight your certified technicians’ skills and knowledge in performing accurate wheel balancing and nitrogen tire inflation, ensuring optimal results for your customers’ vehicles.

Provide Convenient Options

Make it easy for your customers to schedule wheel balancing and nitrogen tire inflation appointments by offering flexible scheduling options and convenient service hours. Consider implementing online booking systems or mobile service units to enhance convenience and accessibility for your customers.

Promote Customer Satisfaction

Above all, prioritize customer satisfaction by delivering exceptional service and personalized attention to each customer. Listen to their concerns, address their questions, and go the extra mile to exceed their expectations. Happy customers are more likely to return for future services and refer others to your business, helping you build a loyal customer base and drive business growth.

By implementing these strategies and introducing the idea of nitrogen tire inflation, you can effectively sell wheel balancing services and nitrogen tire inflation to your customers and position your business as a trusted provider of quality automotive maintenance solutions. Remember, investing in wheel balancing and nitrogen tire inflation today can lead to happier customers, safer roads, and long-term business success.

Posted on Leave a comment

Mastering Car Lift Safety: Essential Tips for Automotive Workshop Owners

Welcome to our guide on understanding car lift safety standards in South Africa! In this section, we’ll delve into the regulations and best practices that govern the use of car lifts in automotive workshops. Whether you’re a seasoned mechanic or new to the industry, it’s crucial to prioritize safety when operating these essential pieces of equipment.

Regulatory Framework

In South Africa, car lift safety is regulated by the Occupational Health and Safety Act (OHSA) and the Driven Machinery Regulations (DMR), specifically Section 18. These regulations outline requirements for equipment maintenance, operator training, and workplace safety standards to ensure the safe use of car lifts in workshops.

Get the full details on the OHSA of South Africa.

Best Practices

In addition to regulatory requirements, there are several best practices that workshop owners and technicians should follow to maintain a safe working environment. Regular inspections of the car lift, including checking for hydraulic leaks, worn cables, and damaged components, are essential to identify potential hazards before they cause accidents. Furthermore, providing comprehensive training to staff on the proper use of car lifts and implementing clear operational procedures can minimize the risk of incidents.

Safety Precautions

When using a car lift, it’s crucial to observe safety precautions to protect yourself and others in the workshop. Always ensure that the vehicle is positioned correctly on the lift and that it does not exceed the lift’s weight capacity. Engage the safety locks to secure the lift in place before starting any work. Regularly inspect the lift for signs of wear and tear, and report any issues to management for prompt resolution.

Pre-Use Inspection Checklist for Your Car Lift

Before you hoist any vehicle onto your car lift, it’s essential to conduct a thorough pre-use inspection to ensure safety for you and your colleagues. By following this step-by-step guide, you can identify potential issues and prevent accidents in your workshop.

1. Visual Inspection

Start by visually inspecting the entire car lift structure, including the columns, arms, and hydraulic components. Look for any signs of damage, such as cracks, rust, or hydraulic leaks. Ensure that all safety labels and warning signs are visible and legible.

Safety instructions for safe operation in 2 post lifts

2. Mechanical Check

Next, perform a mechanical check of the lift’s operation. Test the lift’s hydraulic system by raising and lowering the arms several times, listening for any unusual noises or vibrations. Check that the lift responds smoothly to commands and that all controls are functioning correctly.

3. Safety Features

Verify that all safety features are in good working condition. Test the safety locks by engaging and disengaging them while the lift is in operation. Ensure that the lift’s limit stop mechanism activates properly if it reaches the maximum height or the maximum height for the specific vehicle.

4. Structural Stability

Inspect the anchoring points of the car lift to ensure that they are secure and stable. Check the floor beneath the lift for any signs of cracking or unevenness that could compromise its stability. If necessary, consult with a qualified technician to assess the structural integrity of the lift and its installation.

Concrete showing cracking that can weaken the area around the lift mounting bolts

5. Documentation Review

Finally, review the lift’s maintenance and inspection records to ensure that it has been properly maintained and serviced according to manufacturer recommendations. Keep a log of your pre-use inspections and any maintenance tasks performed, including the date and details of the inspection.

By following this pre-use inspection checklist before operating your car lift, you can minimize the risk of accidents and ensure a safe working environment for yourself and your colleagues. Remember, safety always comes first in the workshop, so take the time to conduct thorough inspections and address any issues promptly.

Mastering Proper Lifting Techniques

When it comes to positioning vehicles on your car lift, mastering proper lifting techniques is essential for safety and efficiency in your workshop. By following these simple yet effective techniques, you can ensure that vehicles are safely hoisted onto the lift without risk of damage or injury.

1. Positioning the Vehicle

Start by positioning the vehicle in front of the lift, ensuring that it is centered and aligned with the lift’s arms. Use a spotter to guide you if necessary, especially when working with larger or heavier vehicles. Take your time to ensure that the vehicle is properly aligned before driving between the pillars into position.

2. Engaging the Lift Arms

Once the vehicle is in position, position the lift arms by carefully moving them underneath the vehicle. Make sure the lifting pad is directly underneath the correct jacking point or strong flat surface on the chassis of the vehicle. Avoid round or angled surfaces as the risk of the vehicle sliding off the lifting pad will be increased in these positions. Adjust the lifting pad height by using the adjustment screws or height adjustment spacers. Do not use loose rubber blocks to adjust the height of the lifting pad.

3. Adjusting the Lift Height

Once the vehicle is securely positioned on the lift, adjust the lift height to the appropriate level for the intended maintenance or repair work. Use the lift controls to raise or lower the lift platform as needed, taking care to maintain a level position throughout the process. Avoid exceeding the lift’s weight capacity or raising the vehicle higher than necessary to prevent instability or tipping.

4. Securing the Vehicle

With the vehicle properly positioned and the lift height adjusted, it’s time to secure the vehicle in place before beginning any work. Double-check that all safety locks and restraints are engaged before proceeding with any work underneath the vehicle. For added safety lower the lift onto the mechanical safety locks to ensure that the vehicle is secure and safe to proceed underneath the vehicle.

5. Safety First

Above all, remember that safety should always be your top priority when working with car lifts. Take the time to familiarize yourself with the specific operating instructions and safety features of your lift, and always follow recommended safety protocols. By mastering proper lifting techniques and prioritizing safety in your workshop, you can ensure a smooth and accident-free experience for yourself and your colleagues.

Crafting Your Emergency Response Plan for Car Lift Accidents

In any automotive workshop, having a solid emergency response plan in place is essential for ensuring the safety of your team and customers. Follow these steps to create a comprehensive plan for responding to accidents or malfunctions involving car lifts.

1. Establish Clear Communication Channels

The first step in your emergency response plan is to establish clear communication channels within your workshop. Ensure that everyone knows how to report emergencies and that there are designated individuals responsible for coordinating the response.

2. Train Your Team

Ensure that all workshop staff members are trained in emergency procedures and know how to respond effectively in case of an accident or malfunction. Conduct regular training sessions and drills to reinforce these protocols and keep them fresh in everyone’s minds.

3. Develop Response Protocols

Create step-by-step protocols for responding to different types of emergencies involving car lifts, such as vehicle entrapment, hydraulic failure, or structural collapse. Specify roles and responsibilities for each team member and outline the necessary actions to take in each scenario.

4. Coordinate with External Resources

In addition to internal response procedures, establish protocols for coordinating with external resources such as emergency services or technical support from lift manufacturers. Ensure that contact information for these resources is readily available and easily accessible.

5. Practice Regularly

Regular practice and drills are key to ensuring that your team is prepared to respond effectively in an emergency. Schedule regular practice sessions to simulate various emergency scenarios and evaluate the effectiveness of your response protocols.

6. Review and Update

Periodically review and update your emergency response plan to incorporate any lessons learned from drills or real-life incidents. Stay informed about industry best practices and regulatory requirements to ensure that your plan remains current and effective.

Conclusion

As you’ve explored the various aspects of car lift safety, it’s evident that prioritizing safety in your automotive workshop is paramount. Understanding industry regulations and adhering to best practices outlined by South African OHSA ensures compliance and promotes a safe working environment.

Implementing a pre-use inspection checklist and following proper lifting techniques are essential steps in maintaining the safety of your car lifts. Regular inspections and adherence to safety protocols minimize the risk of accidents and malfunctions, safeguarding both your team and your customers.

In the event of an emergency, having a well-defined emergency response plan is crucial. By establishing clear procedures and training your team accordingly, you can effectively manage emergencies and mitigate risks.

To further enhance safety in your workshop, we recommend booking a professional service. To ensure that the lifts you’re using conform to South African OHSA standards. Prioritizing safety not only protects your team and customers but also fosters a culture of accountability and responsibility in your workshop.

Book Now.

Posted on Leave a comment

Cam Timing 101: A Comprehensive Guide for Automotive Enthusiasts

Understanding the Basics of Cam Timing in Vehicle Engines

Introduction

Welcome, fellow gearheads, to the exhilarating journey into the heart of every roaring engine—the mystical world of Cam Timing! If you’ve ever wondered why your car purrs like a content kitten or roars like a ferocious lion, you’re in for a treat. Let’s strip away the complexities and dive into the basics of Cam Timing with the excitement of a kid in a candy store.

The Dance of Pistons and Valves:

Picture this: Your car’s engine is like a finely choreographed dance where the pistons and valves waltz in perfect harmony. Cam Timing, our star conductor, dictates when each performer takes center stage. The camshaft, often called the “brain” of the engine, orchestrates this automotive ballet with precision.

In simpler terms, cam timing determines when the engine’s intake and exhaust valves open and close. Get it right, and your engine performs a symphony. Get it wrong, and it’s a cacophony you’d rather not hear.

Types of Cam Timing Systems

Now, let’s explore the different dance routines engines follow. There are two main types of Cam Timing systems: the timing belt and the timing chain.

Timing Belt Tango

Imagine a belt, not dissimilar to the one keeping your pants up, but it’s keeping your engine components perfectly timed. This rubber belt connects the crankshaft to the camshaft, ensuring their movements stay synchronized. A snapped timing belt is like a sudden wardrobe malfunction—it brings the whole performance to a screeching halt.

Chain Samba

Enter the timing chain, a more robust character in our automotive dance. Like a rugged necklace, it connects the crankshaft and camshaft with metal links. While it’s heartier than a timing belt, it’s not indestructible. A broken timing chain is the engine’s equivalent of losing a crucial dance partner.

DIY Tips for Cam Timing Checks

Now that you’re waltzing with the basics, how do you know when your engine’s dance steps are getting a bit clumsy? Fear not, you savvy DIY enthusiast; there are signs to look out for.

Symphony Out of Tune

Listen to your engine’s song. If it starts sounding like a rusty gate rather than a smooth jazz ensemble, your cam timing might be off. Time to grab your tuning fork—or, in this case, your timing tools.

Check Engine Light Waltz

Ah, the notorious check engine light—a frequent guest on our automotive dashboard. It could be a subtle suggestion that your engine’s dance moves need a tune-up. Don’t ignore it; your car might be trying to salsa when it should be foxtrotting.

Fuel Efficiency Foxtrot

Is your car suddenly doing the cha-cha with your fuel budget? Poor fuel efficiency could be a result of mistimed cam steps. Keep an eye on those MPG numbers; your wallet will thank you.

Exploring Different Types of Cam Timing Systems

Unlocking the Secrets: Timing Chains and Timing Belts in Engine Design

In the intricate dance of engine design, one of the fundamental choices engineers make is whether to outfit their creation with a timing chain or a timing belt. Unlike a chameleon changing colors, an engine’s fundamental nature can’t be altered once it rolls off the assembly line. Let’s delve into this unalterable decision and understand why you can’t change the cam timing type of an engine.

**1. ** The Engine’s Symphony: Timing Chain vs. Timing Belt Every engine has its preferred rhythm, and this rhythm is set by its choice of timing mechanism. It’s like the beat in a piece of music—a fundamental part of its identity. The timing chain, a robust and sturdy performer, creates a different symphony compared to the smooth and refined notes of a timing belt. The engine is tuned to these specific beats from the start.

**2. ** Built for a Purpose: Design Dictates Mechanism The decision between a timing chain and a timing belt is ingrained in the engine’s DNA during the design phase. It’s not a mere cosmetic choice; it’s a decision based on the engine’s intended purpose, performance demands, and the desired maintenance schedule. Like a tailor choosing the right fabric for a suit, engineers select the timing mechanism that aligns with the engine’s character.

**3. ** Why the Unchangeable Nature? Once an engine is built and assembled, changing its internal components, especially something as integral as the timing system, is akin to rewriting the script of a movie that’s already been filmed. The components are precisely calibrated to work in harmony, and altering this delicate balance could lead to catastrophic consequences.

**4. ** The Domains of Specialists: Engine Modification For those who crave a different beat for their engine, the route lies not in changing the timing system but in engine modification. Specialists and enthusiasts sometimes opt for engine modifications, where they might swap out the entire engine or make targeted changes to enhance performance. However, this is an intricate process best left to those well-versed in the mechanical symphony of engines.

DIY Tips for Cam Timing Checks and Adjustments


Unlocking Precision: The Dance of Cam Timing Locks in Belt Replacements

1. Prelude: The Routine of Regular Belt Changes In the choreography of engine maintenance, the cam timing locks take center stage during regular intervals of cam belt replacement. This routine ensures that the engine’s heart, the timing system, continues to beat in perfect harmony. Imagine it as a well-rehearsed dance, where each move is calculated, and precision is paramount.

2. Cam Timing Locks: The Backbone of Belt Replacement Enter the cam timing locks—the unsung heroes of the timing system overhaul. These tools are the backstage crew, holding the components in a frozen tableau while the star of the show, the cam belt, is replaced. Their role is crucial, ensuring that every tooth of the belt aligns perfectly with the rhythm of the engine’s rotation.

3. The Synchronized Change: Installing the New Cam Belt As the new cam belt takes its place, the cam timing locks maintain their grip, holding the camshaft in a static position. This static ballet is the key to a synchronized change, where the belt slides into position, teeth interlocking with the precision of a well-practiced routine. It’s a moment where the past meets the future, and the locks ensure a seamless transition.

4. The Grand Finale: Removing the Locks for the Debut With the new belt securely in place, it’s time for the grand finale—the removal of the cam timing locks. This is the moment when the engine, once frozen in time, is set free to dance to the tunes of combustion. As the locks step aside, the engine roars to life, marking the debut of a perfectly timed performance.

In the symphony of engine maintenance, the use of cam timing locks is a ritual of precision and accuracy. They are the guardians of synchronization, ensuring that each rotation is a step in the right direction. So, as you perform this routine, remember that the cam timing locks are the silent choreographers of a dance that keeps your engine in perfect rhythm.

Recommended Timing Tools for Every Automotive Workshop

*1. ECU Era Essentials: Tools for the Modern Maestro In this digital age where engines dance to the tune of Electronic Control Units (ECUs), your toolkit must reflect the technological revolution. Say farewell to the conventional timing light and welcome the ECU-era essentials—tools that sync seamlessly with the digital maestro.

Imagine having tools that complement the precision of your ECU, ensuring that every step in cam timing is a digital symphony. From crank locks to camshaft alignment kits, these essentials become your trusted companions in the era of automotive digital choreography.

*2. Crank and Cam Harmony: Alignment Kits for Seamless Sync In the grand performance of cam timing, the harmony between the crank and cam is crucial. Picture this: a crankshaft pulley holder and camshaft alignment tools, working in tandem to create a synchronized ballet of engine components.

With these tools in your arsenal, achieving the perfect alignment is not a chore but a graceful dance. Your engine becomes a stage where the crank and cam perform a seamless duet, orchestrated by tools designed for precision in every rotation.

*3. Digital Wizards: Advanced Diagnostic Scanners Step into the realm of digital wizards—advanced diagnostic scanners that decode the intricate language of your ECU. These scanners are not just tools; they are the magic wands that unveil the secrets of your engine’s timing intricacies.

Imagine holding a scanner that transforms the complexities of your engine’s digital choreography into user-friendly insights. With real-time data at your fingertips, you become the wizard of timing, navigating the digital landscape with ease and confidence.

*4. Future-Forward Investments: Tech-Savvy Timing Kits As you embark on your journey into the future of automotive precision, consider future-forward investments in tech-savvy timing kits. These kits go beyond conventional tools, incorporating digital elements that align seamlessly with the evolving language of ECUs.

Visualize a toolkit that not only sets the timing but also speaks the language of your ECU, ensuring compatibility with the ever-advancing technology. In this era of innovation, your timing tools become more than instruments—they become a testament to your workshop’s commitment to staying ahead in the digital race.

In the grand narrative of automotive timing, your toolkit is not just a collection of tools; it’s a story of adaptation and evolution. Embrace the ECU era with essentials that resonate with the digital heartbeat of modern engines. From alignment kits to diagnostic wizards, these tools are not just recommended—they are the protagonists in your workshop’s journey toward precision and excellence.